Sheepy Pants

I've been working my fingers off getting ready for Earth day this week:

The cherries capris and the snake shorties were done but not embellished, the rest of them I knit this week. The red sack was an order, the others I made as samples for the Earth Day Festival. My local mom's group ran a diaper changing and nursing station, and also provided information on cloth diapering and baby wearing. We have a bunch of cloth diaper samples given to us by various companies so people can see them in person. I wanted to have some soaker samples too.


Here's a closeup of the back of the blue one. It's my favorite - though it drove me crazy to make. The yarn was dry and hurt my hands, and it's hand spun and was supposed to have texture variation (which I knew when I ordered it, I thought it would look cool for the water) but this had such thin parts that I kept having to break it and splice it back together. VERY annoying. I had about 2 yards left at the end *whew* And then I had more trouble embroidering that orange fish on top of the uneven stitches.
BUT... I think it turned out awesome.

Back of the snake shorts. I really like how these came out.
I'm pretty close to opening a store. I'm about 90% decided on a name


I have 4 more orders to work on, that will keep me busy for a while.

Yarn Over Short Rows

A lot of people have been asking me about short rows lately, so I thought I'd post how I do them. This post will be picture intensive, but I wanted it to be really clear.

Short rows are a way of shaping a knitted garment by working only part of a row, turning around in the middle and working back. It can be used to turn the heel of a sock, to add length in the back of the neck of a sweater knit in the round, to create darts in the bustline, or in the case of diaper soakers, to make more room in the back than in the front to allow for all that diaper room. More information about the uses of short rows can be found here.

In almost every case, the issue with short rows is the hole. If you just turn around in the middle of knitting and add 2 extra rows (back and forward again) then when you come to the place you turned you end up with a nice big ugly hole. Several methods have been invented to deal with this hole.

The most common way of dealing with it is by wrapping. You knit to the place you want to turn around, slip a stitch to the right needle, pull the yarn forward and slip the stitch back to the left needle, thereby wrapping the working yarn around the first unworked stitch. Then when you come back around to knit it, you knit that wrap together with the stitch, which will pull together the hole. There is a video of doing this method here (scroll about half way down). Nona also had a series of posts about several different short row techniques (scroll most of the way down).

The problem with wrapping is that it can leave a bump, or a hole anyway, especially if you pull the wrap too tight. It just seems to be a fiddly way to do it and it causes a lot of people problems, especially with the second (right hand) wrap when knitting in the round.

My personal preference is the yarn over technique. It's very similar to Japanese short rows, but I just don't like to bother fiddling with pins. For those familiar with it, it's also basically what the wooly wonder forums calls the unwrapped technique. But again, I don't like fiddling with wrapping and then unwrapping the stitch, when wrapping around the needle (yarn over) produces the same result with less effort.

So here's how I do it. You can click on the pictures to enlarge them if you wish.


Knit to the turning point

Turn knitting around


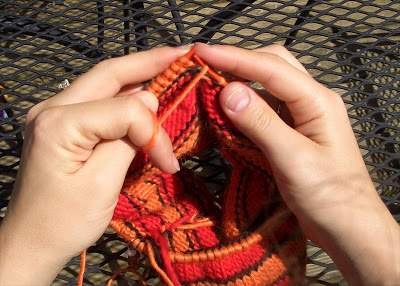
Wrap the yarn around the right needle

Purl your way back to the next turning point

Turn knitting around to the right side and wrap the yarn around the right needle again


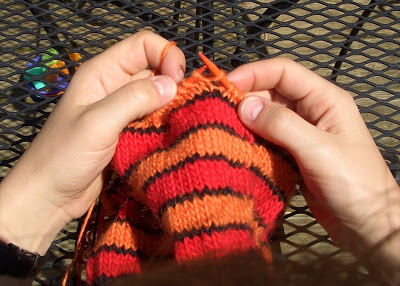
Continue knitting as normal until you come to the first yarn over


Knit 2 together (the yarn over with the first unworked stitch on the other side of the gap).


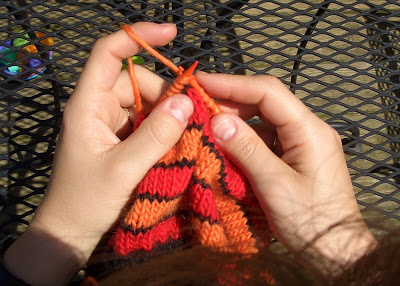
The yarn over should fall behind the other stitch and close the gap.

Knit around until you come to the stitch before the second gap.
(This is the right hand side of the short row).


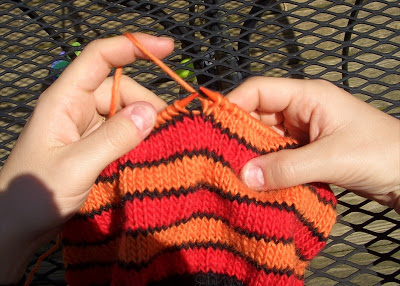
Slip the next stitch knitwise... slip the yarn over knitwise...

and the insert the left needle into both stitches and knit them together (this is an SSK).
This will close the gap and place the yarn over behind the stitch.


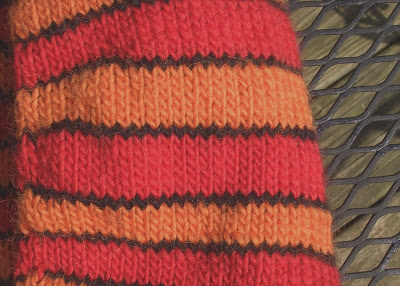
Voila! You've worked a short row!

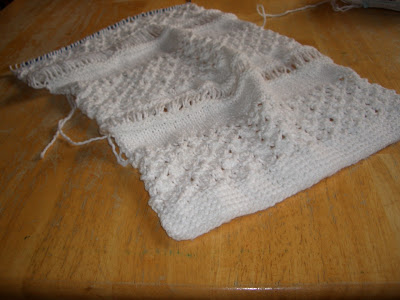
You can see where they are because of the change in the stripe pattern, but they are virtually invisible in the finished work unless you examine the stitch definition very closely.


I hope that helps some of you figure out short rows!

Happy Birthday To Me!


Colored Denise Interchangeable needles from knittinghelp.com arrived today. I LOVE them.

I've thought about getting interchangeable needles for a long time but I was really thinking I'd end up with a bamboo set. Both bamboo sets I know of are $100 or so, with fewer needles, but I really didn't think I could enjoy knitting on these Denise needles, which are resin. The plastic needles I've used in the past were awful.

One of the wonderful ladies from my knitting group let me knit on some of her Denise a few weeks ago and I HAD to have them. Lucky for me my birthday was coming up so my DH bought them for me. I asked for the colored ones, which are more expensive, but worth it, I think. I'll hopefully have these for a lifetime, so I might as well have some that make me happy.

My birthday isn't for 2 weeks, but I get my present early. Yay!

Don't Drink the Kool-Aid

It's been so long since I've posted!
Here's something I've been working on. It's a soaker sack for an infant that I dip dyed:

I threaded a skewer through the top of the soaker


This is a pot with a packet of grape kool aid, a glug of vinegar, and about 2 inches of warm water. I used a spare needle to get the soaker to stay up, and put the pot on the stove on low. Every so often I unrolled a bit more of the soaker into the water.


And here's the result!

I'm pretty happy with it :)